11 KiB
Important: The content is being updated and amended throughout the spring semester of 2020!
An Introduction to Python and Programming
The purpose of this repository is to serve as an interactive "book" for a thorough introductory course on programming in the Python language.
The course's main goal is to prepare the student for further studies in the "field" of data science.
The "chapters" are written in Jupyter notebooks which are a de-facto standard for exchanging code and results among data science professionals and researchers. They can be viewed in a plain web browser with the help of nbviewer:
- Introduction: Start up (lecture | review | exercises)
- Part A: Expressing Logic
- Part B: Managing Data and Memory
However, it is recommended that students install Python and Jupyter locally and run the code in the notebooks on their own. This way, the student can play with the code and learn more efficiently. Precise installation instructions are either in the 00th notebook or further below.
Feedback is encouraged and will be incorporated. Open an issue in the issues tracker or initiate a pull request if you are familiar with the concept.
Prerequisites
To be suitable for total beginners, there are no formal prerequisites. It is only expected that the student has:
- a solid understanding of the English language,
- knowledge of basic mathematics from high school,
- the ability to think conceptually and reason logically, and
- the willingness to invest 2-4 hours a day for a month.
Installation
To follow this course, a working installation of Python 3.7 or higher is expected.
A popular and beginner friendly way is to install the Anaconda Distribution that not only ships Python but comes pre-packaged with a lot of third-party libraries from the so-called "scientific stack". Just go to the download section and install the latest version (i.e., 2019-10 with Python 3.7 at the time of this writing) for your operating system.
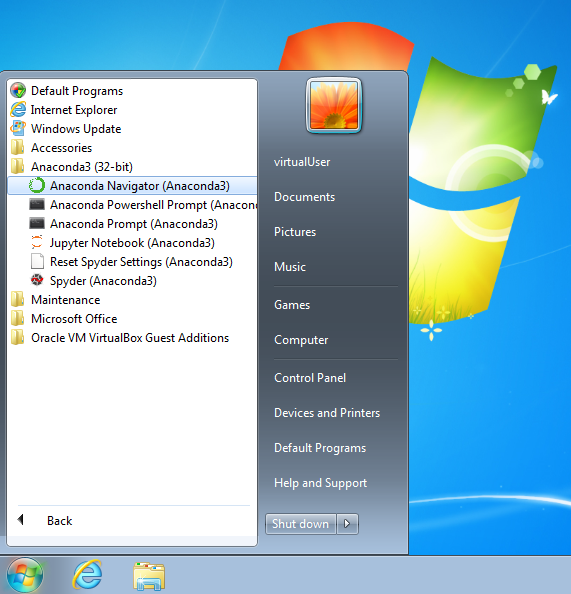
Then, among others, you will find an entry "Anaconda Navigator" in your start menu like below. Click on it.

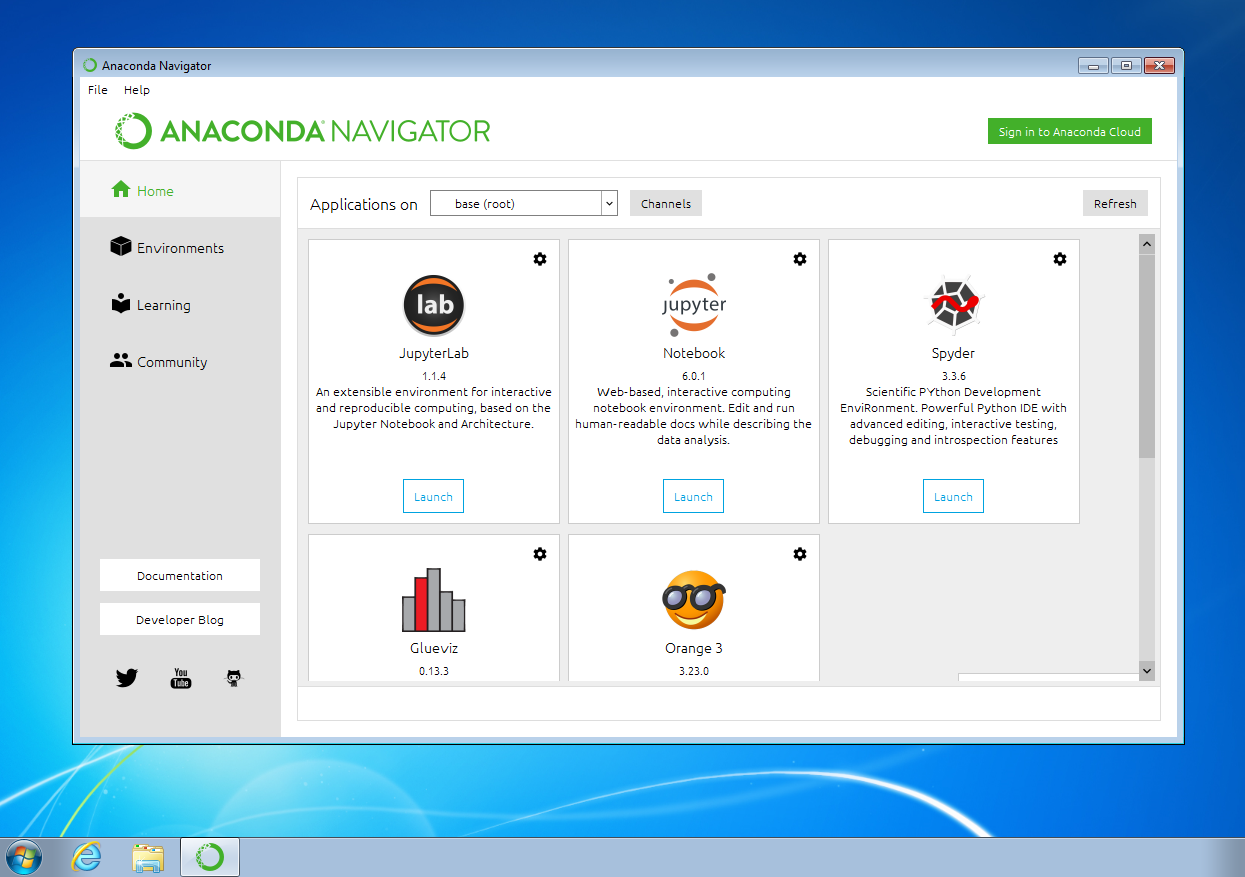
A window opens showing you several applications that come with the Anaconda Distribution. Now, click on "JupyterLab."

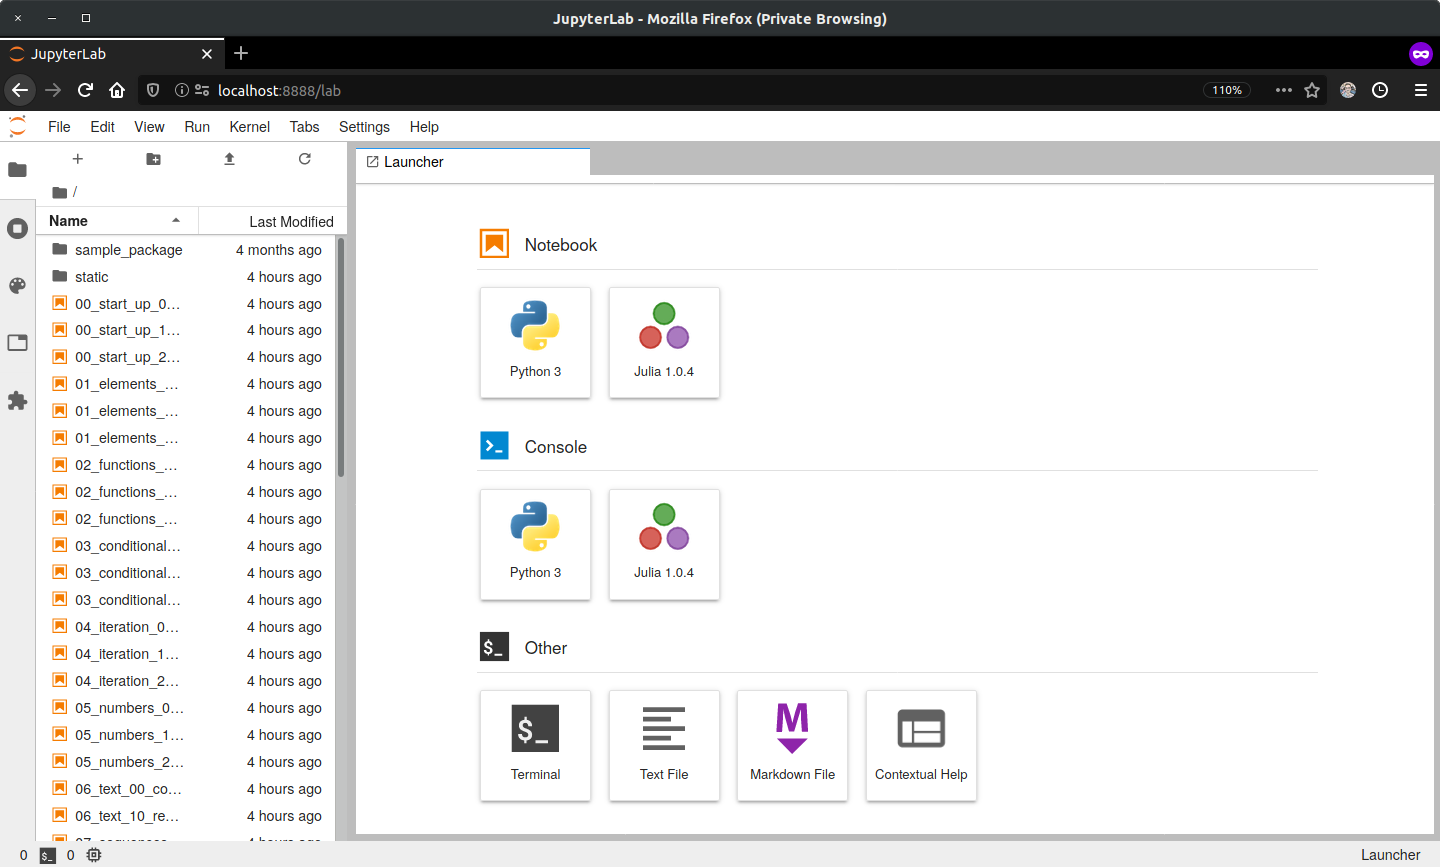
A new tab in your web browser opens with the website being "localhost" and some number (e.g., 8888). This is the JupyterLab application that is used to display and run the Jupyter notebooks mentioned above. On the left, you see the files and folders in your local user folder. This file browser works like any other. In the center, you have several options to launch a new notebook file.

Next, to download the course's materials as a ZIP file, click on the green "Clone or download" button on the top right on this website. Then, unpack the ZIP file into a folder of your choosing, ideally somewhere within your personal user folder so that the files show up right away in JupyterLab.
Alternative Installation (for Instructors)
Python can also be installed in a "pure" way as obtained from its core development team (i.e., without any third-party packages installed). However, this may be too "advanced" for a beginner as it involves working with a terminal emulator, which looks like the one in the picture below and is used without a mouse by typing commands into it.

Assuming that you already have a working version of Python 3.7 or higher installed (cf., the official download page), the following summarizes the commands to be typed into a terminal emulator to get the course materials up and running on a local machine without the Anaconda Distribution. You are then responsible for understanding the concepts behind them.
First, the git command line tool is a more professional way of "cloning" the course materials as compared to downloading them in a ZIP file.
git clone https://github.com/webartifex/intro-to-python.git
This creates a new folder intro-to-python with all the materials of this repository in it.
Inside this folder, it is recommended to create a so-called virtual environment with Python's venv module. This must only be done the first time. A virtual environment is a way of isolating the third-party packages installed by different projects, which is considered a best practice.
python -m venv venv
The second venv is the environment's name and by convention often chosen to be venv. However, it could be another name as well.
From then on, each time you want to resume work, go back into the intro-to-python folder inside your terminal and "activate" the virtual environment (venv is the name chosen before).
source venv/bin/activate
This may change how the terminal's command prompt looks.
poetry and virtualenvwrapper are popular tools to automate the described management of virtual environments.
After activation for the first time, you must install the project's
dependencies (= the third-party packages needed to run the code), most
notably JupyterLab in this project
(the "python -m" is often left out but should not be;
if you have poetry installed, you may just type poetry install instead).
python -m pip install -r requirements.txt
The requirements.txt file also installs the black
tool (incl. the blackcellmagic
extension) and the RISE extension.
With them, the instructor can easily re-format code in a class session and
execute code in presentation mode (currently RISE only works with the
older jupyter notebook command).
With everything installed, you can now do the equivalent of clicking the "JupyterLab" entry in the Anaconda Navigator.
jupyter lab
This opens a new tab in your web browser just as above.
About the Author
Alexander Hess is a PhD student at the Chair of Logistics Management at the WHU - Otto Beisheim School of Management where he conducts research on urban delivery platforms and teaches an introductory course on Python (cf., Fall Term 2019, Spring Term 2020).
Connect him on LinkedIn.